It doesn't matter where you live, you'd be silly not to get out there and sample a variety of restaurants in your surrounding area. Going around and trying different cuisines at various restaurants makes the mandatory process of fueling your body that much more exciting after all. MASSIVELY OBVIOUS SEGUE ALERTZWORZ!!!
Soooo, should you count yourself as a bit of a restaurant-touring gourmand, perhaps this Japanese noun and it's following expression will come in handy:
食べ歩き(noun)
たべあるき
tabearuki
食べ歩きをする (verb)
たべあるきをする
tabearuki wo suru
So we literally have eat-walk/ eat-walk do. This expression means to go out and try food at various eating establishments. So if you're a bit of a foodie and you want to attest to that fact in Japanese, well then, you are now loaded with the know how.
例文 / れいぶん / Reibun (Example Sentence):
僕は食べ歩きをすることが多いので、「ザ・グールマン」ってよんでいいですよ~
I often go out and sample various restaurants, so you may feel free to call me "The Gourmand" if you would like to.
Literally: Regarding me, walk-eat (going out to sample restaurants) do matter numerously exist therefore, "The Gourmand" call me agreeable (emphatically).
Literal translations like these are useful for you guys coming to grips with the order of verbs and objects etc. in Japanese sentences. They are often hilarious too, so that's a bonus.
But some of you beginners of Japanese might be thinking that something is up here. "Where's the る in 食べる/eat?" and "I thought walk was 歩く!" you may be asking and pondering respectively. Well, what we see here is an example of a (and I'm going to avoid technical terms for this one) "double verb sandwich." However this double verb sandwich has actually been altered to make it a noun. So there are two things funky going on with 食べ歩き. Before it gets too confusing, let's break it on down.
Funky 1. Double verb sandwiches (DVS)s are commonly formed in Japanese. When fusing two verbs together to make a DVS, you must think of the first verb in it's ーます form and proceed to rip off the ます, leaving the ます verb stem. So in the case of 飛び込む (to literally jump, leap, dive or plunge into something physical or conversely to figuratively leap, plunge into something intangible) we have taken 飛ぶ (to fly, leap etc.) put it into the polite/ます form, 飛びます, proceeded to cut off the ます (in working with my analogy, let's just imagine we're trimming off the bread crusts for our DVS) and we are left with the ます stem form, 飛び, rather than the dictionary form 飛ぶ. Place this together with 込む and you have your DVS.
Funky 2. Altering a verb to make it a noun: When you slice off the crusts of a polite/ます form verb to make a ます stem, you can "noun-ify" a verb. I am fairly confident in saying that you can't just use the ますstem as a noun for any old verb you choose because some sliced verbs may rarely or never be used in speech or writing and not be in circulation at all. With that said though, consider the very relevant 歩き. In this form, we have the noun, 'walk' as used in sentences such as "to go on a walk" or "this walk will go through the forest and take 5 minutes."
So, there you have it. 食べ歩き! Gourmands and Japanese scholars take note! Next time you are in Japan, make sure you indulge in 食べ歩き. It is indeed a very excellent part of the world to do it, thanks to the considerable regional variety.
Have fun learning Japanese! If you want to share some DVSs, drop me a comment! Cheers.
===============================================
Bonus Material
Why make DVSs in the first place?
Well, I would say to add a dimension or flavour to a verb in order to create these cool all-in-one double verbs. The Japanese have been able to modify the first verb in DVSs with the second in order to (for example)
-modify the extremity to which a verb is done (particularly in the case of DVSs ending in ー込む- which can be used to say "do/done thoroughly")
-form a verb or noun that at once describes a process that comprises two (truly or roughly) simultaneous actions (today's 食べ歩き being a great example)
- otherwise add nuance or flavour to the leading verb
- plus (likely many) other purposes.
Here's a fun note on DVSs
You will often see double verb sandwiches with a に filling (has the analogy gotten old yet?? :p). For example, to go out (and have a good time/play/visit etc.) 遊びに行く is the phrase of choice. Here we have the ますstem of 遊ぶ (play, enjoy oneself etc.), the delicious に particle, with a slice of 行く (to go, proceed), so literally "to go and play." Here's another: 見に来る (見る's ますstem, に, 来る) so literally to see and come, meaning "to come and see."
Thanks for staying around! Love ya!
=================================================
Showing posts with label Derricious Foodz. Show all posts
Showing posts with label Derricious Foodz. Show all posts
Tuesday, 1 November 2011

Saturday, 23 April 2011
Making Yaki Udon Dan's Version! ダニエルの焼きうどんを作ってみました!(In English and 日本語で)
A pleasure to be bringing another cooking blog to the boil. I have had yakisoba (焼きそば) a few times already and have helped making it at a few international BBQs in Brissy, but, it was only until recently that I tried yakiudon (焼きうどん). I love soba and udon, but for my money, I would always go for udon because of it's thickness and texture and all round pleasure to eat. The first yakiudon I ever tried was soo delicious, that I had to go home and try cookng it for myself. Dan's version replaces the traditional seasonings with black pepper, oyster sauce and sesame oil.
INGREDIENTS
 2 breasts of skinless chicken
2 packets of udon
Ginger and garlic
Cabbage (quarter will suffice)
Half a red capsicum
2 carrots
1/3 of a leek sliced thinly (Dan's version)
3 eggs
Black pepper
Soy sauce
Oyster Sauce (Dan's version)
Sesame oil (just a 'hit' of)
3 tablespoons of vegetable oil
The procedure is dead easy, the only vaguely tricky part is in the timing of the addition of ingredients.
Preparation
1. Chop carrots and ginger into small rectangles. Garlic can be roughly or finely chopped, your choice.
2. Slice cabbage into thin sheets, about half a centimetre thick.
3. Capsicum can be roughly chopped into 3x3cm portions.
4. Leek should be sliced on the diagonal about half a centimetre thick.
5. Flash boil (5-10secs) instant udon and then run under cold water. Carefully loosen to separate.
6. Beat 3 eggs and grind black pepper into the mixture.

2. Now add leek and capsicum along with a third of a cup of water, cook for 1-2 mins
3. Add udon and a good covering of soy sauce (about 6 tablespoons). The soy and water should work together to steam the udon and vegetables. Stir fry for another 2 mins.
4. Next add some more water if needed and add some oyster sauce, about 4-5 tablespoons (don't be shy!)
 5. Finally add the beaten eggs and pepper and stir throught the mixture so it clings and binds to the ingredients.
6. Check the firmness of the ingredients and if the veges are the right texture it is time to serve. OPTIONAL: You may want to add a small dash of sesame oil to finish it all off.
Well that wraps up another cooking adventure. I will endeavour to start cooking some Australian recipes for future installments. Until then, happy cooking!
よろこんでもう1つの料理ブログを発表します。もうすでに焼きそばを何回か食べたことがあり、ブリスベンの友達と国際的なBBQで作ったことがあるけれども、最近まで焼きうどんを試したことはありませんでした。そばもうどんも好きですけれども、「どっちが好きか」と聞かれれば、厚さと食感と食べたときの感動から言って、うどんが一番好きな麺です。最初試した焼きうどんがすごくうまくて、すぐに家に帰って作って見ました。ダンのバージョンは、黒胡椒、オイスターソースとごま油で伝統的な調味料を置き換えています。

2 packets of udon
Ginger and garlic
Cabbage (quarter will suffice)
Half a red capsicum
2 carrots
1/3 of a leek sliced thinly (Dan's version)
3 eggs
Black pepper
Soy sauce
Oyster Sauce (Dan's version)
Sesame oil (just a 'hit' of)
3 tablespoons of vegetable oil
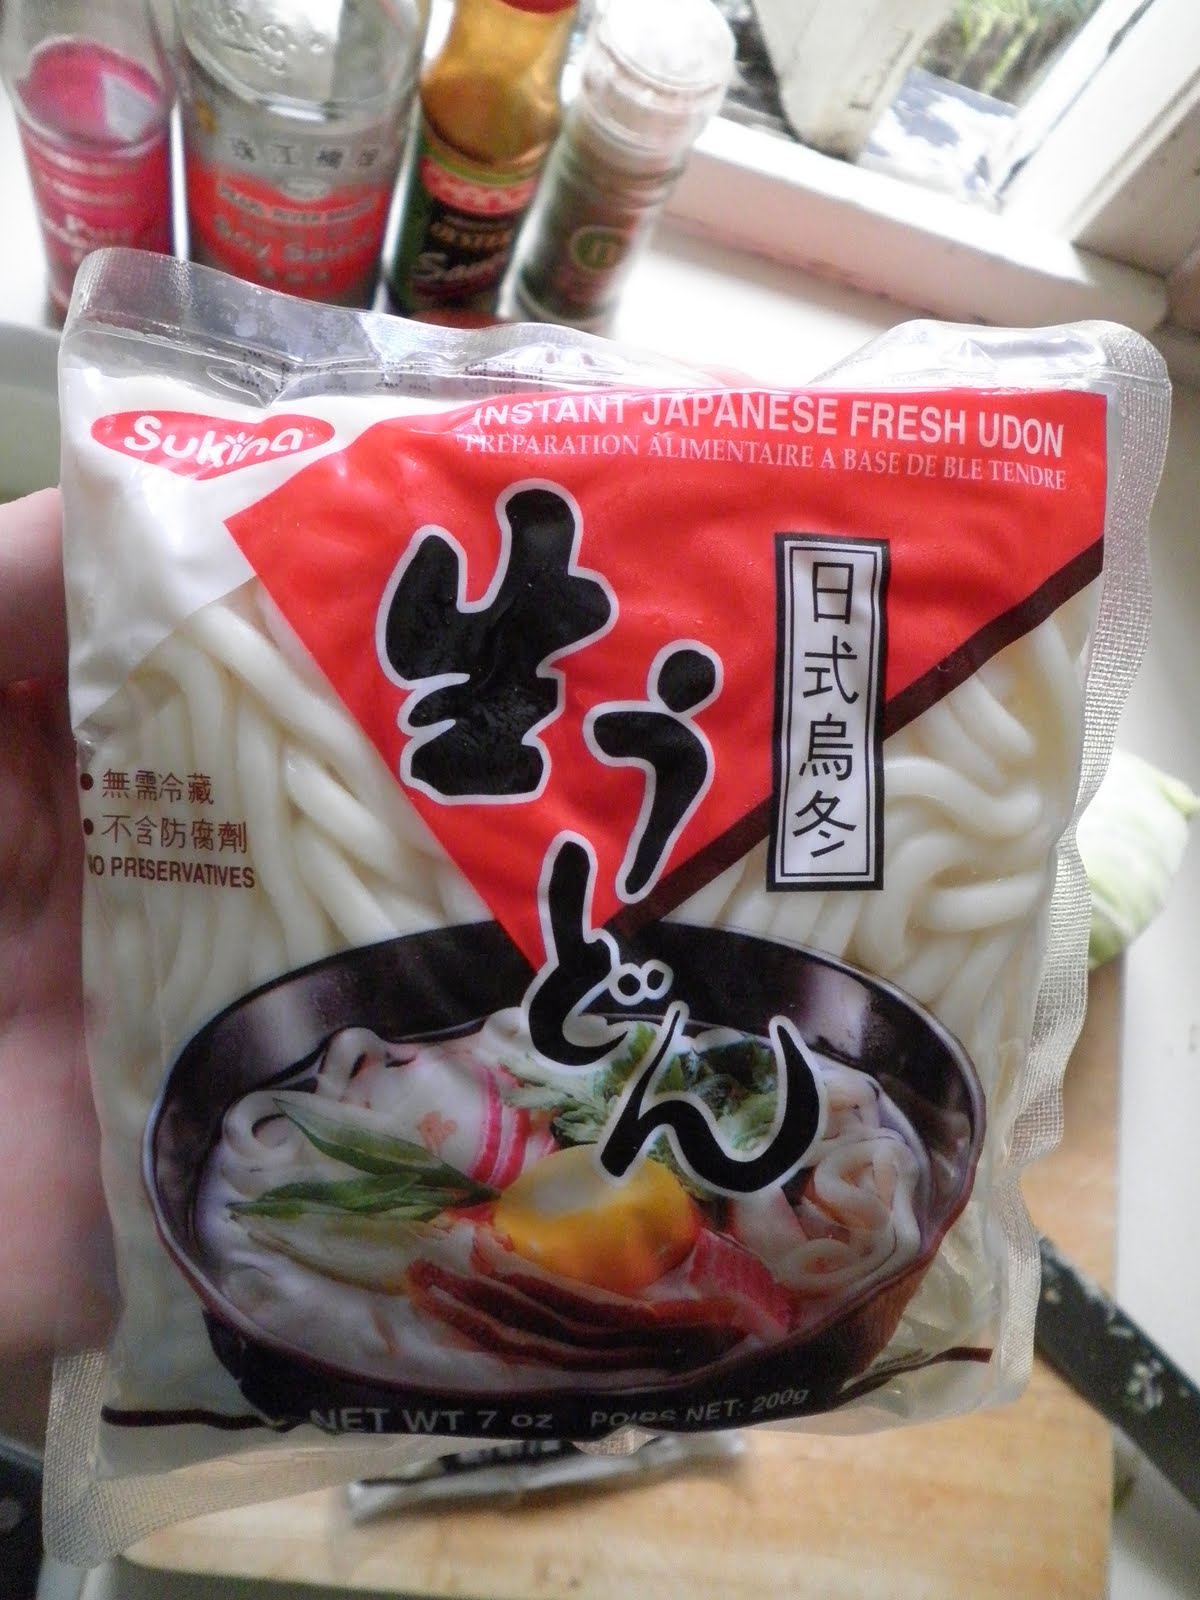 |
| Instant udon is convenient and tastes excellent インスタントうどんは便利で めちゃめちゃ美味しいです。 |
 |
| Slice carrot and ginger into small rectangular slices 人参とショウガを長方形になるように 切ってください |
材料 (3人分)
鶏胸肉: ~400g位
インスタントうどん: 2パック
ショウガとニンニク: お好みの量
キャベツ: 1/4個
赤いピーマン: 1/2個
ニンジン: 2本
西洋にらねぎ: 1/3個 (薄くスライスした)
卵: 3個
水: 100ml
水: 100ml
黒胡椒: 少々
醤油: ~6大匙
カキ油: 3-4大匙
ごま油: 最後に少々入れてください
植物油: 3大匙
PROCEDURE
The procedure is dead easy, the only vaguely tricky part is in the timing of the addition of ingredients.
Preparation
1. Chop carrots and ginger into small rectangles. Garlic can be roughly or finely chopped, your choice.
2. Slice cabbage into thin sheets, about half a centimetre thick.
3. Capsicum can be roughly chopped into 3x3cm portions.
4. Leek should be sliced on the diagonal about half a centimetre thick.
5. Flash boil (5-10secs) instant udon and then run under cold water. Carefully loosen to separate.
6. Beat 3 eggs and grind black pepper into the mixture.
作り方
作り方のだいたい簡単ですけれども材料を入れるタイミングが難しいのでご注意ください。
準備
1.人参とショウガを小さな短冊形に切ってください。ニンニクをみじん切りか粗みじんに切ります。
2.キャベツを約0.5cmの厚さに千切りしてください。
3.ピーマンを3cm角に切ってください。
4.西洋にらねぎを薄い斜めに切りにします。
5.す早く(約5-10秒)インスタントうどんを軽く茹で、次にうどんを冷ますため冷たい流水にくぐらせます。
6.卵3個をかき混ぜ、それに黒胡椒を少々入れてください。

Cooking
1. In a deep frying pan or wok, heat oil on high and add chicken, garlic, carrot and cabbage. Cook for about 3-4mins2. Now add leek and capsicum along with a third of a cup of water, cook for 1-2 mins
3. Add udon and a good covering of soy sauce (about 6 tablespoons). The soy and water should work together to steam the udon and vegetables. Stir fry for another 2 mins.
4. Next add some more water if needed and add some oyster sauce, about 4-5 tablespoons (don't be shy!)
調理
1.フライパンまたは中華鍋で植物油を高温まで温めたあと、そこに鶏肉、ニンニク、人参とキャベツを入れて下さい。約3-4分炒めます。
2.次に、西洋にらねぎとピーマンを入れて水を3分の1のカップを注いで2分炒めます。
3.うどんと醤油(約大匙6)を追加します。醤油と水でうどんと野菜を蒸します。2分間炒めます。
4.好きなようにもっと水を注いで約大匙 4-5のオイスターソースを入れて(尻込みしないでください!!)

6. Check the firmness of the ingredients and if the veges are the right texture it is time to serve. OPTIONAL: You may want to add a small dash of sesame oil to finish it all off.
5.最後に、かき混ぜた卵と黒胡椒を注いで全体を混ぜてとじます。
6.野菜の硬さを確認してもし硬さが良ければ、出来上がりです。オプション:終了の時にごま油を少々入れます。
 | ||
| Enjoy! It is good with a draught beer! エンジョイします! 生ビールと一緒に食べるのがおすすめです。 |
もう1つのクッキングアドベンチャーを終了しました。未来のブログのために、オージーのレシピを料理をするようにします!それまで、ハッピークッキング!^^
Tuesday, 12 April 2011
The 1st MOS Burger for Australia!! Reviewed!


He then went on to say that another 4 stores are planned for the city by year's end. Delicious progress indeed for my home city. So about 2 weeks after it's opening, I and a few friends headed on to see what was all the fuss. For me, this was my first MOS experience, so I was quite excited. On arrival, we got to enjoy another bit of Japanese culture, waiting in a long line, haha. Even at 2ish weeks following it's opening, the restaurant was still bulging at the seams.
Anyway, a small wait later and in we are trying the:
->MOS Burger (Classic/Original/Vanilla)
->The 1000 Vegetable Burger (Warning: contains meat)
->Yakiniku Rice Burger
REVIEW

Ok, delving into the flagship model first. The first thing that I noticed on biting into this one was the epic size of the tomato, something that seems to be a MOSism. The onions and sauces gave the burger a very pleasant barbeque grill taste. This in addition to the tasty meat patty made this a nice burger. For a fast food item, the meat patty was very flavoursome and has much more character than the ones on a McD's burger. Bad points were that the tomato I got was really flour-y and the bun tasted a little stale. So overall, I would give this a 7/10.

This burger did not have a thousand vegetables on it so it lost points straight away with us, haha. Anyway, this time around, we got a beatifully soft and sweet bun with all components being super tasty and fresh. I assumed that the 1000 would have meant 1000 island dressing or something, but the sauce, though the right colour for it, tasted better than that. So that still remains a mystery, please comment if you know the answer. Everything was delicious so for fast food standards, this gets a solid 9/10.

The manifestation of West meets East, the rice bunned-burger containing delicious marinated beef. This was pretty darn good, the meat was tasty and the rice bun was nice. It wasn't anywhere as near as crispy as the pictures seemed, so that was a little disappointing, but nevertheless, a tasty burger worth 8.5/10
Overall, I was impressed by MOS burger Sunnybank. The food was pretty good and the service was great. The line moved fast and the friendly staff gave us menus and took orders in advance to keep the line going. I was also thrilled that the manager understood my "ご馳走様 でした" (thanks for the feast) as we left the store.
Here's hoping we get a Freshness Burger in the near future to add to the growing asian influence in Brisbane.
Sunday, 27 February 2011
Making Chikuzen Ni is FUN!! 筑前煮を作るのが楽しいよ!

Ingredients:
300g chicken
1 Burdock root/ Gogo skinned and sliced ~ 3cm columns
1 Carrot
1/2 Renkon/ Lotus root chopped
Bamboo shoot pieces
~8 Shiitake mushrooms
3 large Taro roots
100g Konnyaku /Yam jelly
Snow peas or green capsicum to garnish
Seasonings:
Dashi Broth (home-made)
Cooking Sake
Soy Sauce
Sugar (can be omitted if you use Kirin (sweet) as your cooking sake)

Techniques/Manual Labour:
Use a spoon to scrape/dig out pieces of Konnyaku. Apparently this is preferable to chopping because it will absorb the flavour of the stew better if you use the scraping motion. In any case it is fun to do =)
You have to then flash boil the Konnyaku for 5 seconds to remove 'the unique odour and scum'. I would suggest 10-15 secs as it is kind of recalcitrant.

Dashi Broth Stage 1. After soaking Dashi Konbu kelp for 30mins, put it on low-med heat for 10mins then remove. The picture is not great for showing it, but it has a beautiful green colouration and it has a subtle but nice perfume to it.

Some of my friends, Mirin, Soy Sauce and Sesame Oil--->

Bring the broth to boil and take off the heat immediately. Add 20g Kezuribushi/Bonito flakes (dried, thinly flaked bonito/skipjack tuna) and soak. Skim off any white bubbly stuff.
.

After like a 5 minute soak strain the broth and Ta-Da! here it is
.

Put in a generous amount of sesame oil and stir-fry all ingredients until chicken starts to brown.

Transfer to pot and add 600-800ml Dashi, 60ml Sake, 50ml Soy sauce and 35g Sugar. Simmer on low-med until sauce is reduced by a half.
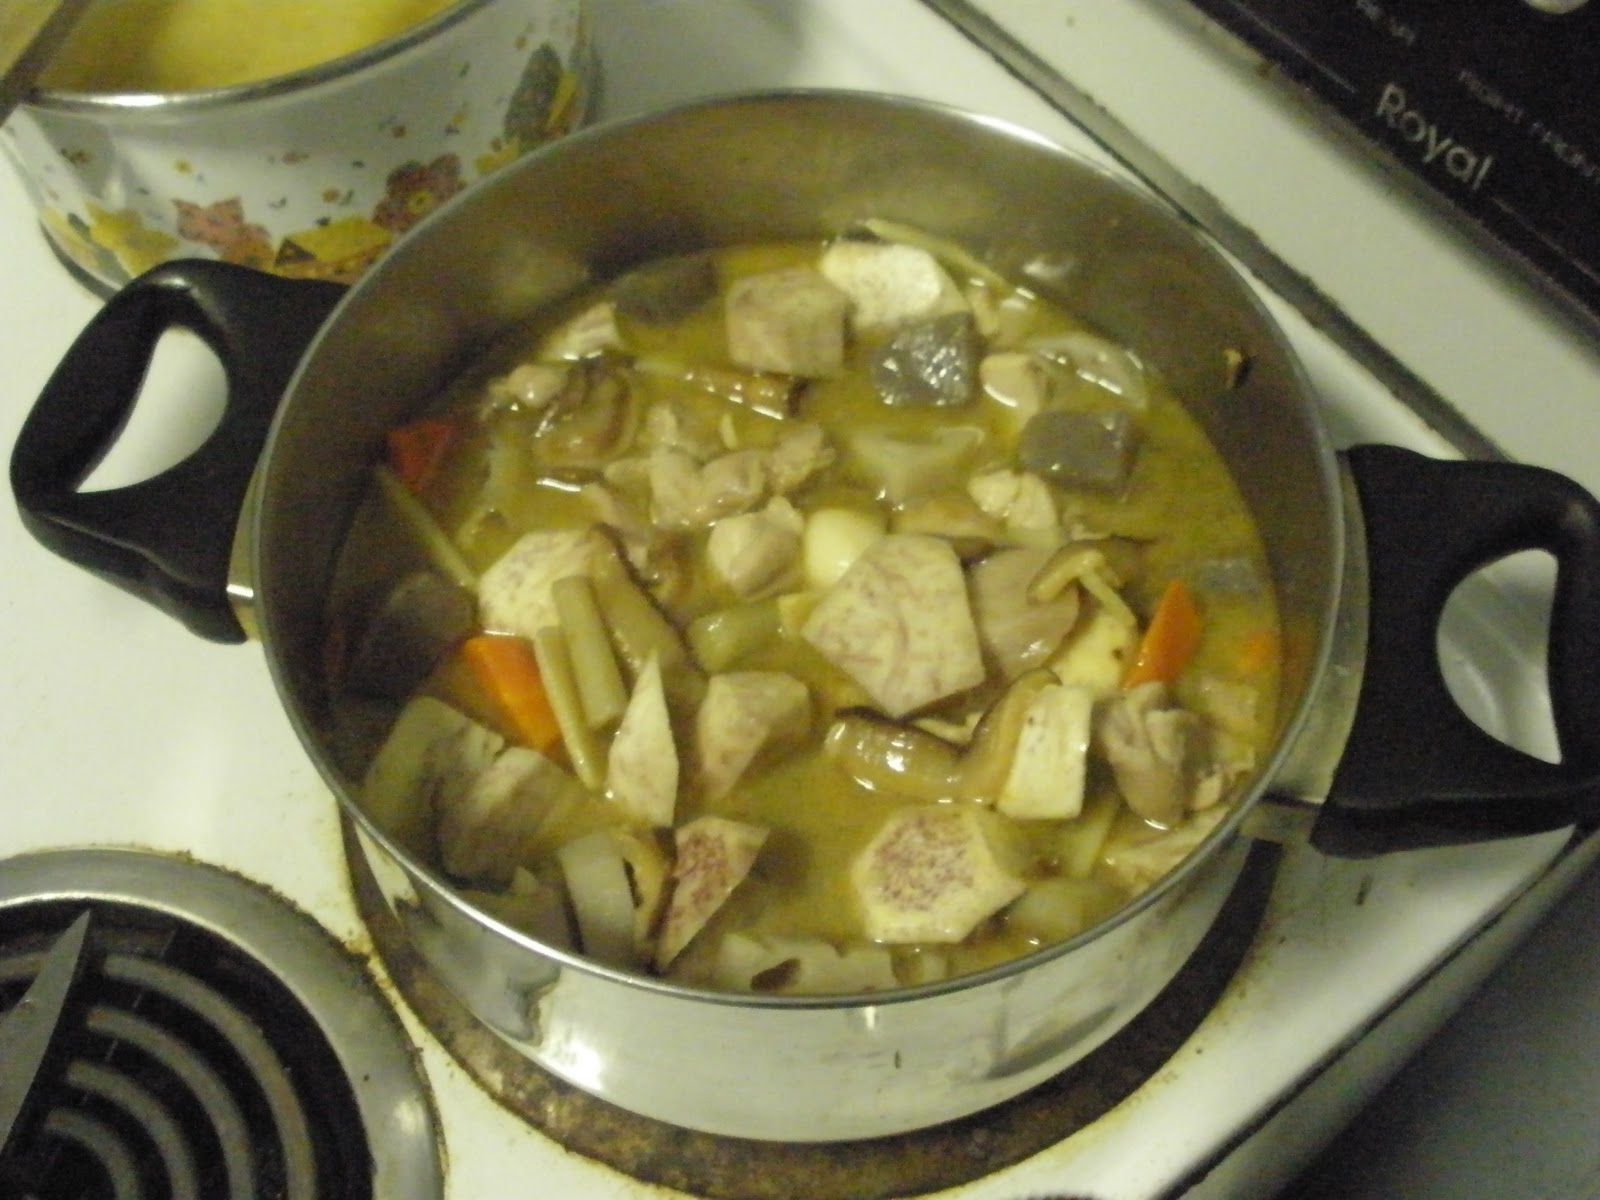
This is what it looks like when it has reduced (thickened).

Towards the end put in some sliced capsicum and cook for a further 5mins. Serve up and enjoy! I suggest drinking fortune milk with this (haha!)
Subscribe to:
Posts (Atom)